Administration of users is just as easy as the administration of articles and contacts in Ingenious.V12. All “Users”, that is every operator who would like to work with Ingenious.V12 needs an access account in order to log on to Ingenious.V12. This account at least consists of the login name, the password and the user group (several users with the same rights). Of course, with this account you cannot only arrange the users in groups, but you also have the possibility to issue individual rights for each user, or also deny them. In addition, information about each user can be stored and thus the user rights changed any time.
General
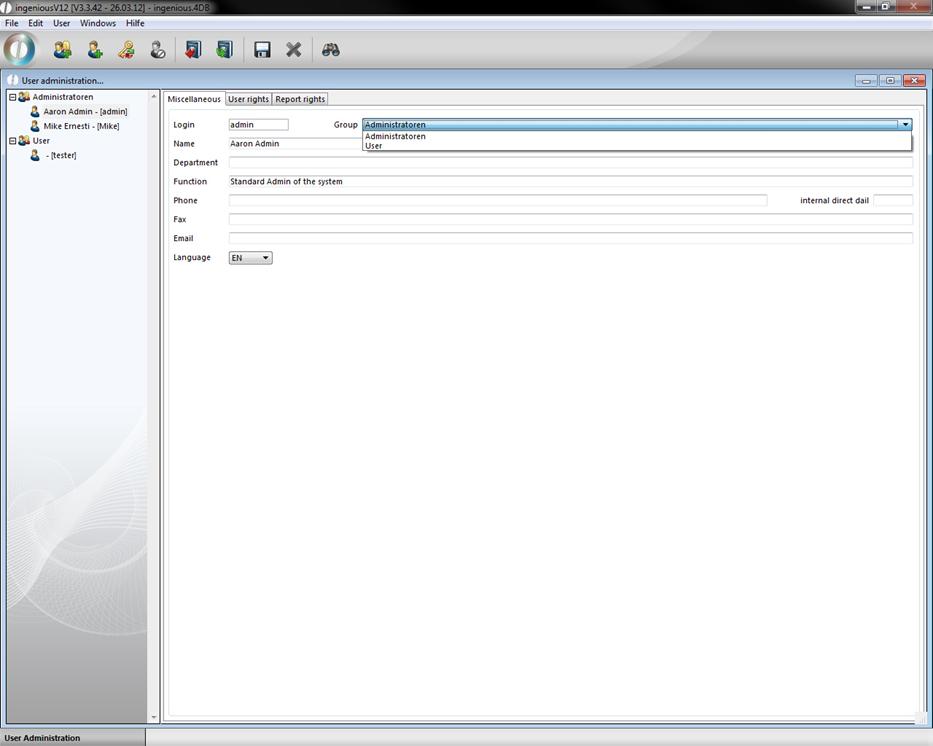
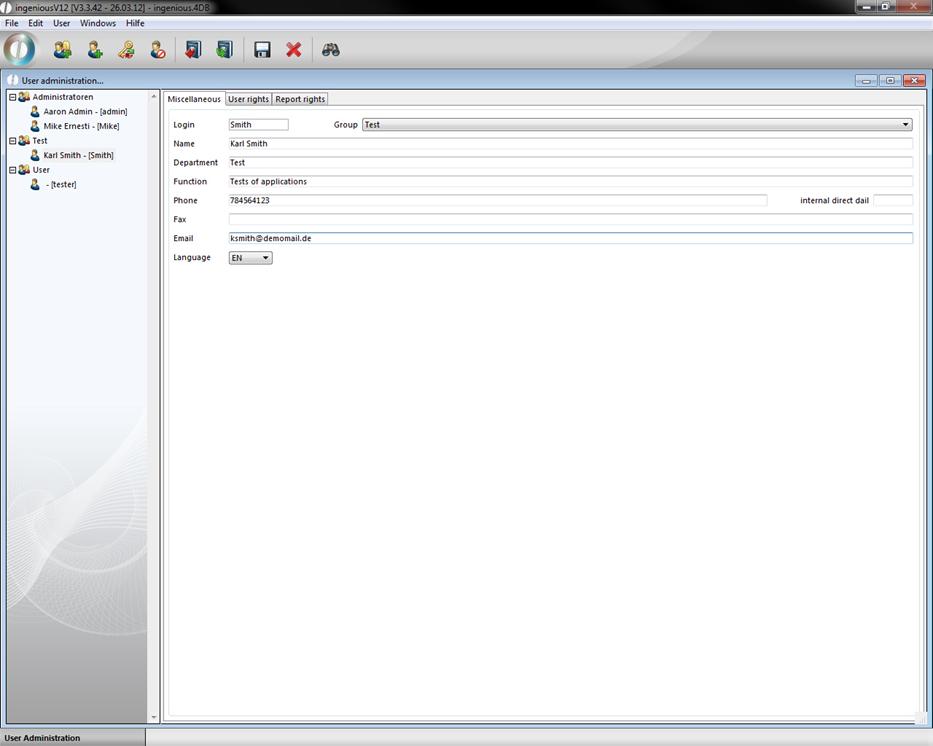
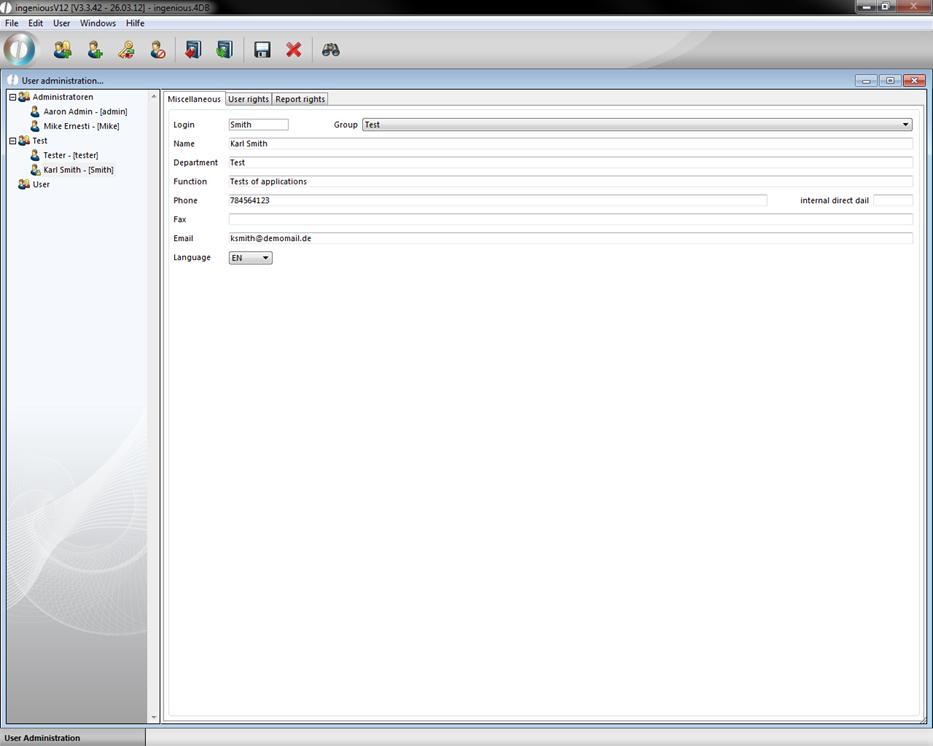
The start view of the user administration has a tree diagram on the left side, showing the group membership of each user, and on the right side detail data for each respective user in the register card “Miscellaneous”. Here you can assign a user to a group or a section. In addition, fields for “Name”, “Function”, “Telephone”, “E-Mail and a pop-up field for the selection of the user’s language can be installed.
User administration
User administration controls the access to confidential internal data, thus only authorized personnel of your company should be allowed to open the user administration and issue user rights. However, at least one user profile that has unlimited rights from Ingenious .net should exist. In the computer world such a user is identified as “Administrator”. He/ she has the possibility to enter new users or groups and to modify or delete them. Should there be more than on of the so-called “Admin” in your company (i.e. director, deputy), it would be sensible to establish a separate group. In the following exercises, you will learn how to establish a group or a user, how to modify passwords, how to deactivate users temporarily or delete them.
Attaching a new group
Only a few steps/clicks are necessary to attach a new group.
-
First click on the button.
-
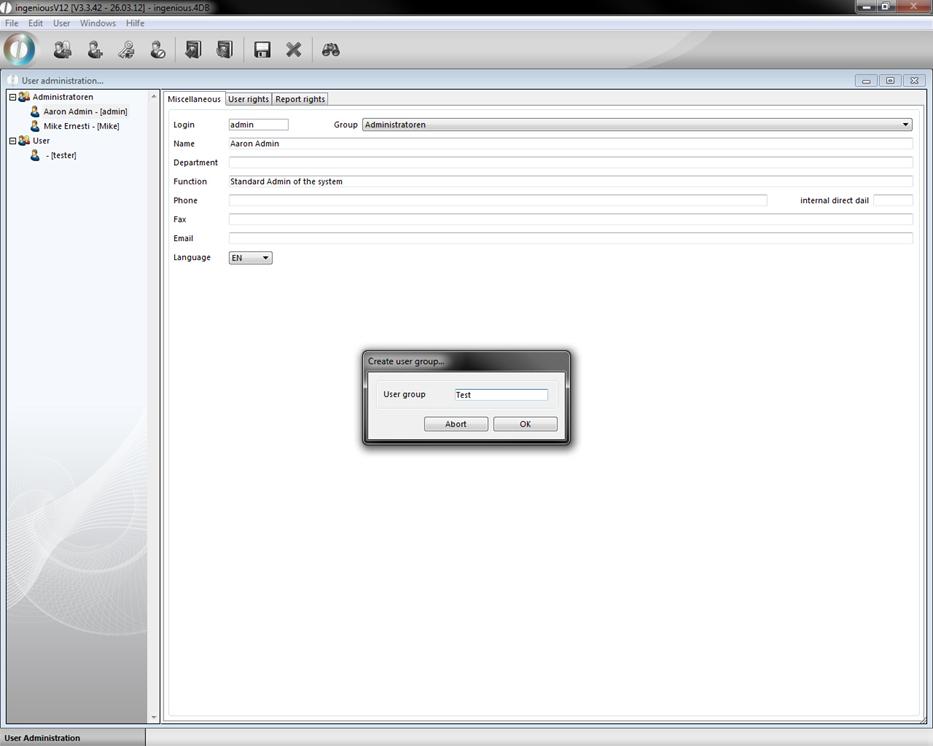
A menu appears to give the group a name. Here please enter the group name “Test” for practice purposes.
-
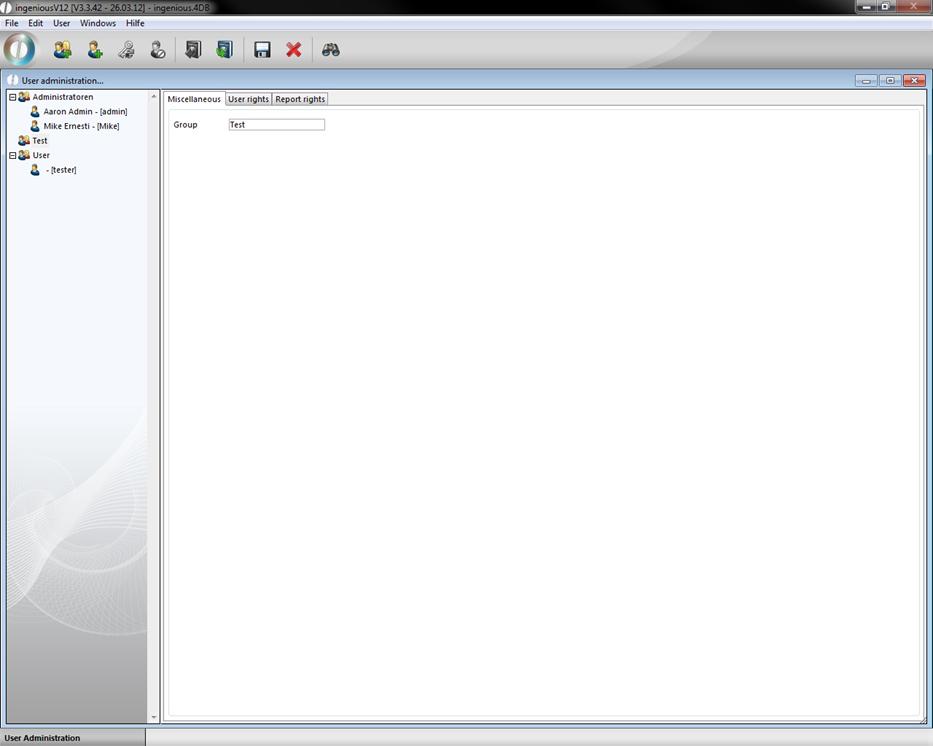
The group appears with a group icon in the tree diagram (left) of the user administration.
The group profile as well as the user profile consist of three index cards with numerous possibilities to limit rights.
Register card “General”
Installing a new user.
Before one adds a user right, one must think about what the user must be able to do, in order for the coworker to complete his tasks. Everything that is not needed for the coworker’s task should be denied him for security reasons. This way it cannot happen that an intern accidentally deletes all contacts.
In order to attach a new user, proceed as follows:
-
Click on the “Create new user” button.
-
A window opens for the data entry. Enter the necessary data such as “Login name”, “Login Password” and “Group”.

-
Confirm with the “OK” button.
The user profile of the selected group is assigned in the tree diagram and can be edited.
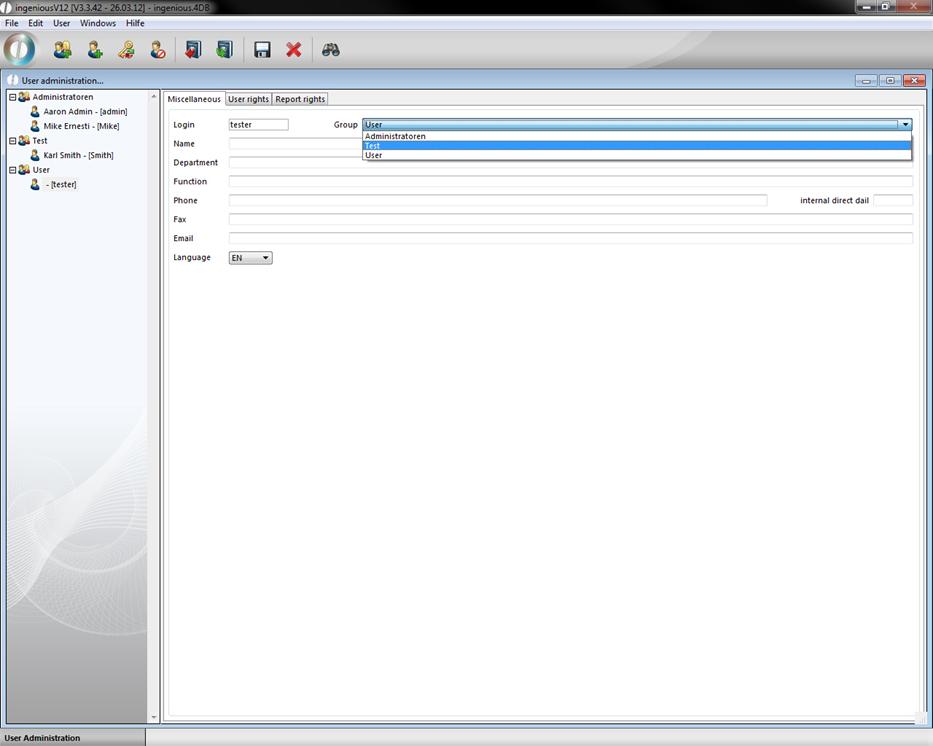
Assigning users another group
-
Select the moved user profile with a mouse click from the tree diagram.
-
In the pop-up field in the “Miscellaneous” register select the new group (in this example, please select the “Test” group).
A security question appears to ask if the user profile really should be moved.
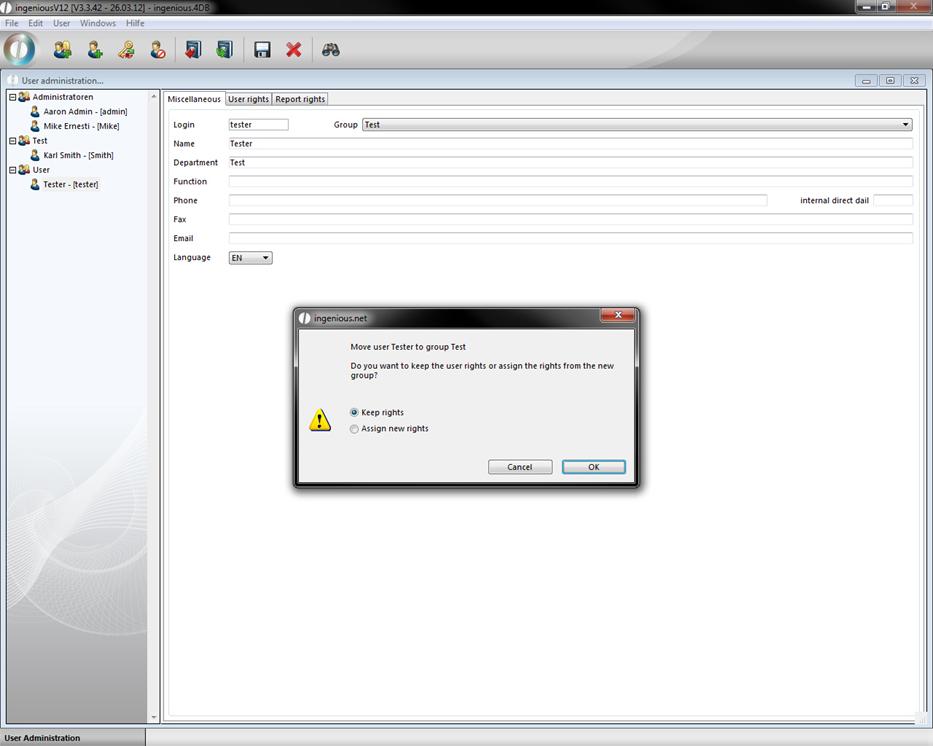
3. After the confirmation with the “OK” button, the user in the new group appears.
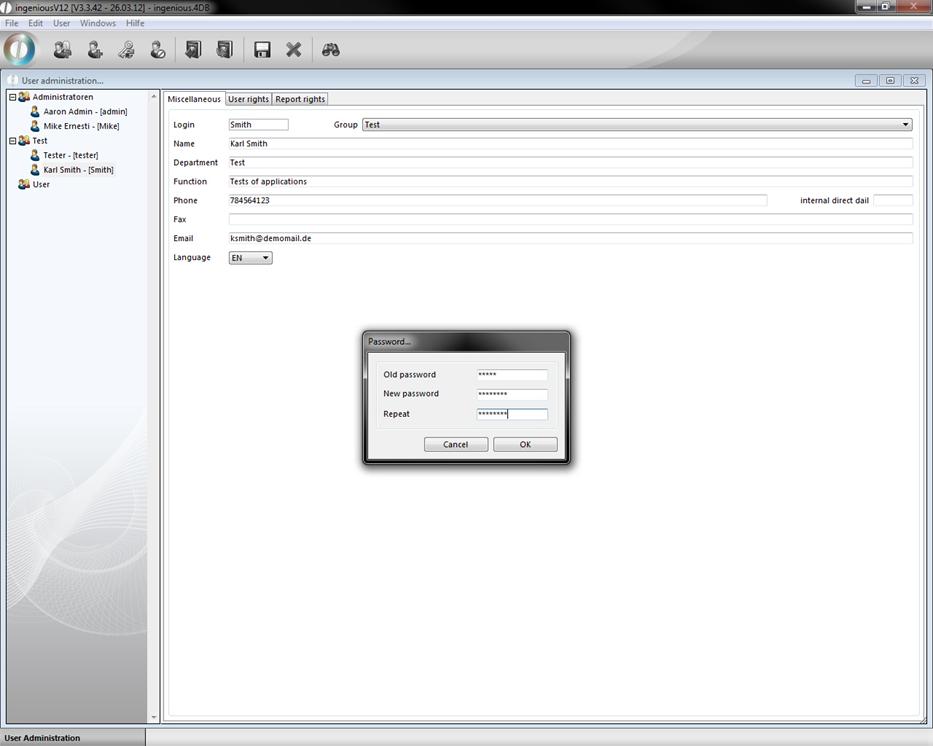
Save user password
In order to change a password, proceed as follows:
-
Click on the button.
A window opens to replace the old password with a new one.
-
After the password change, click on “OK” in order to activate the changes.
Deactivate users
In order to temporarily deactivate the user, while a coworker is on vacation for instance, only a click on the ![]() button is necessary. The view of the user in the tree structure changes as follows:
button is necessary. The view of the user in the tree structure changes as follows:

Active user
Deactivated user
Delete user or group
The deletion of users or groups occurs with the ![]() button.
button.
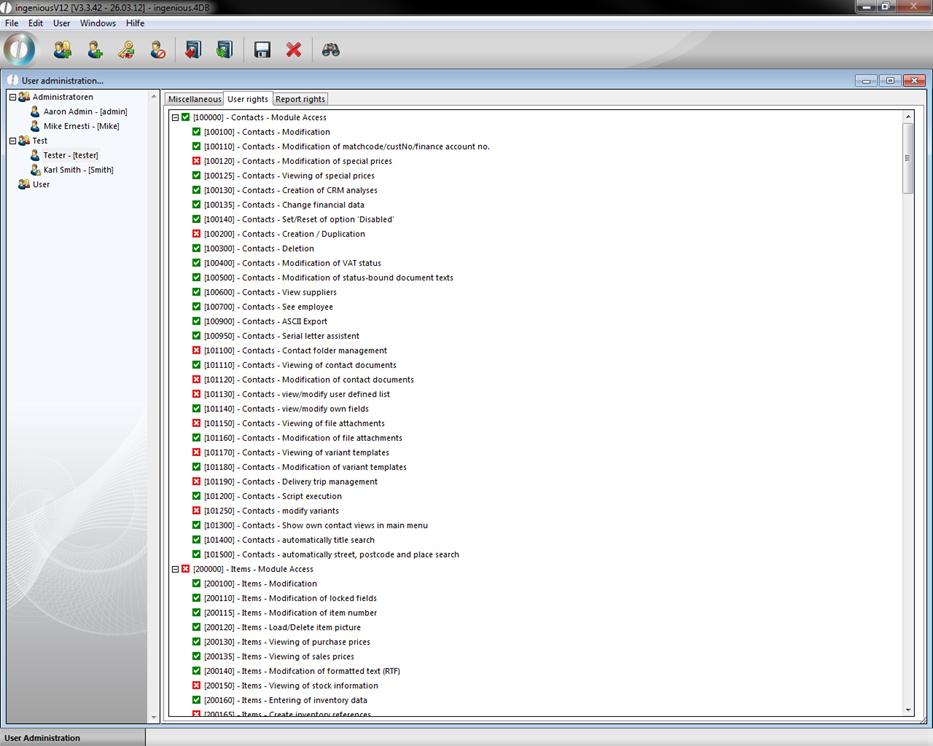
User rights
The register card “User rights” comprises all rights that a user can have in order to make changes in Ingenious.V12. These are like group membership displayed in a tree diagram. Here you can limit the user rights for the work in individual modules and administration tools.
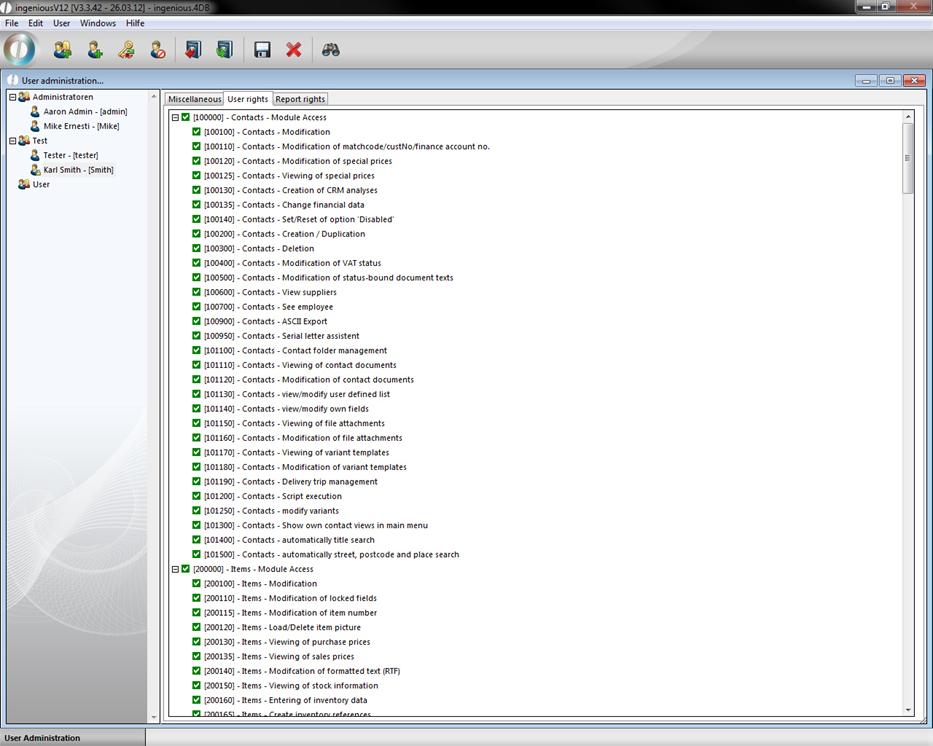
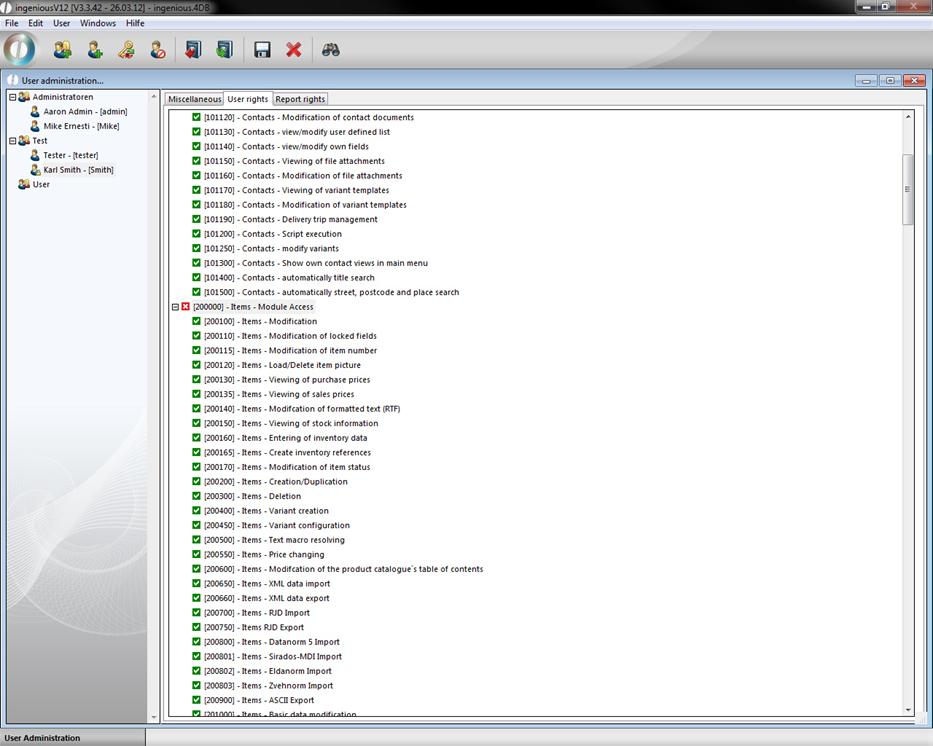
There are two options to limit user rights. Either you completely block the user from accessing a module, or you limit the rights within a module. In order to block total access to a module, a click on the mentioned so-called collective right of this module is sufficient. A collective right (also called a rough right) can comprise several subordinate rights (so-called special rights. If one deactivates such a collective right by double-clicking (![]() activated,
activated, ![]() deactivated), all (subordinate) rights included herein are deactivated.
deactivated), all (subordinate) rights included herein are deactivated.
Module access sales deactivated
Total access to the module is now denied the user. At the next user login, the “Sales” module is not visible to the user anymore.

Should a user have to revert to data in the “Distribution” module, but is not allowed to delete quotations, the special right “Deletion of quotations” will be deactivated.
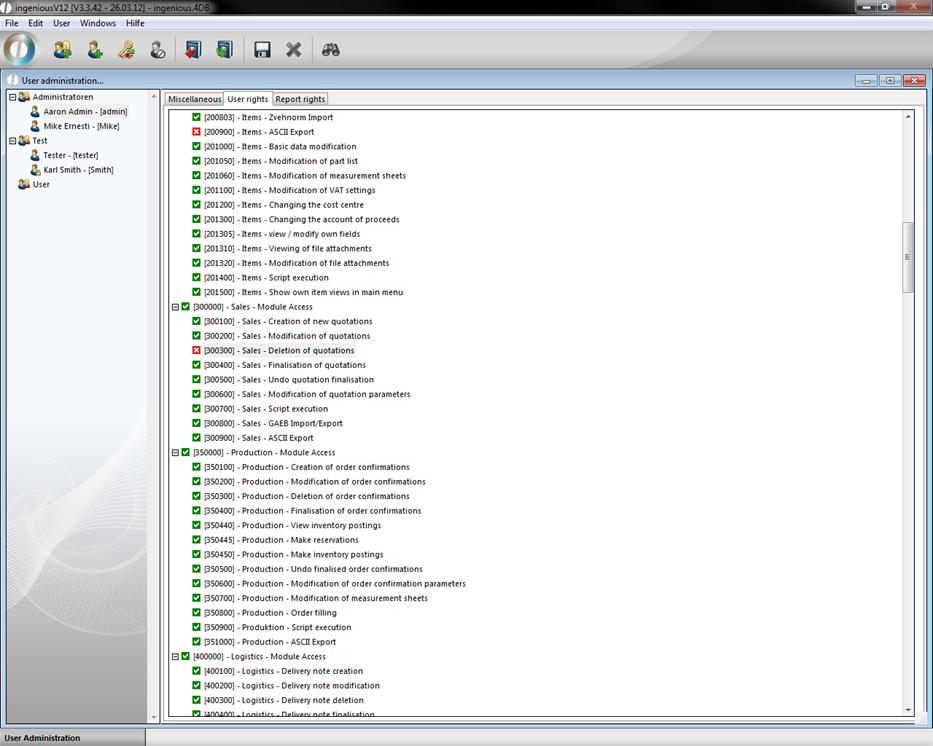
The user cannot delete any quotations
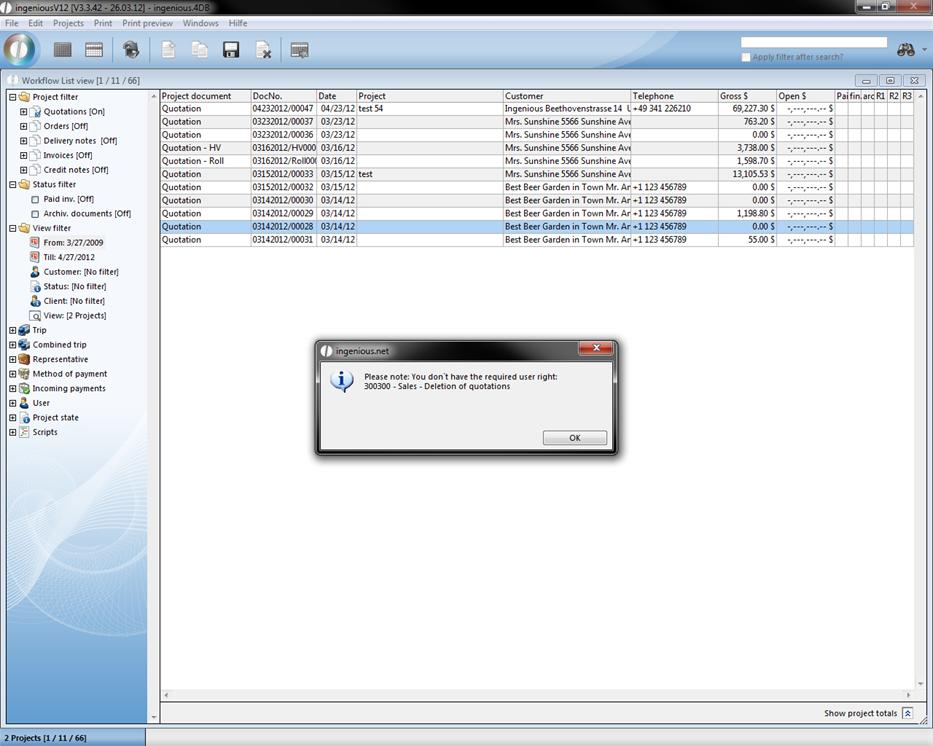
Error report when trying to delete a quotation
In this manner the administrator from Ingenious.V12 can give the user the rights that correspond to the field of his activities.
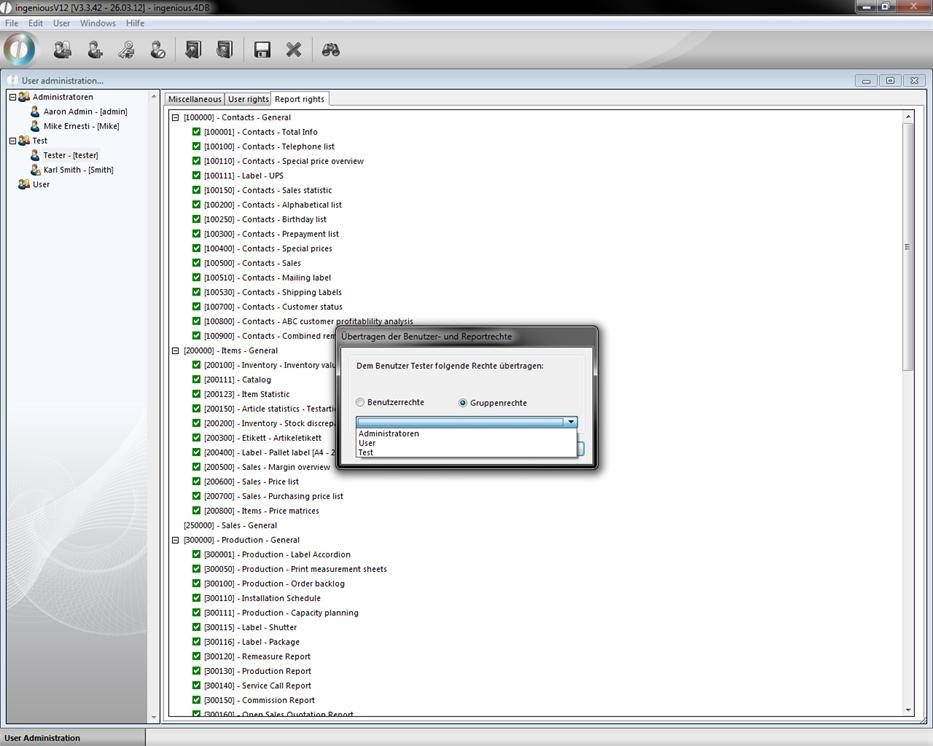
Report rights
The register card “Report Rights” contains all rights in which the information retrieval is exemplified in report format.
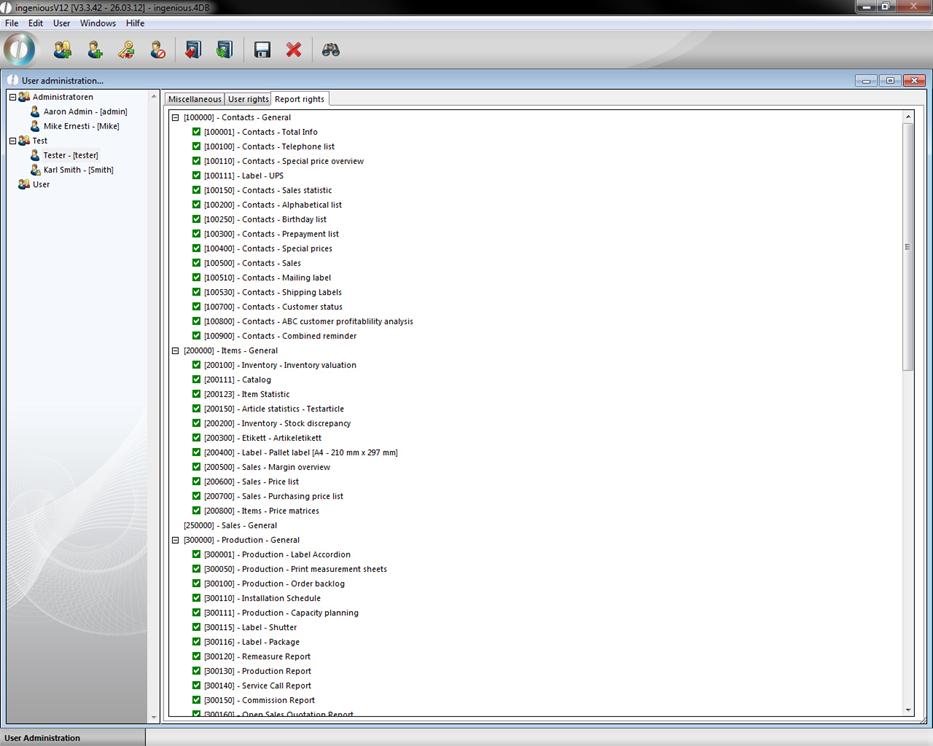
Register card “Report rights”
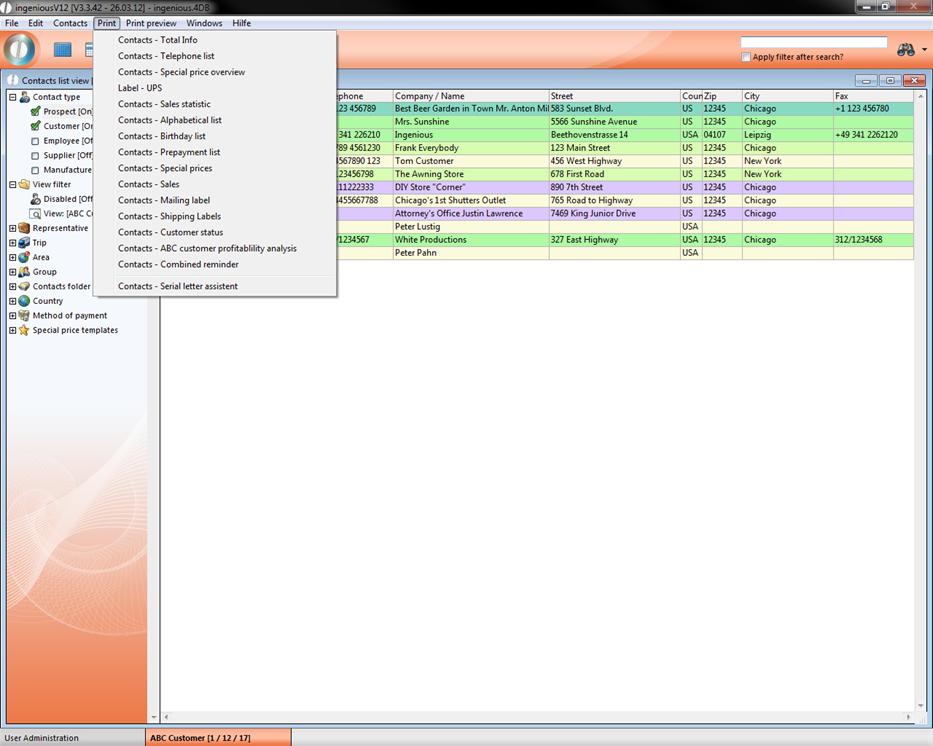
If one gives, for instance, a user all report rights for the “Contacts” module, the user can go back to all reports in this module.
User possibilities
If one refuses some user rights to the user, then these print reports are no longer available (analog user rights).
It is possible to transfer report and user rights from one to another user. With a click on ![]() you can transfer selected rights to another user.
you can transfer selected rights to another user.
In the following example the user rights of “Aaron Admin” are transferred to “Tester”
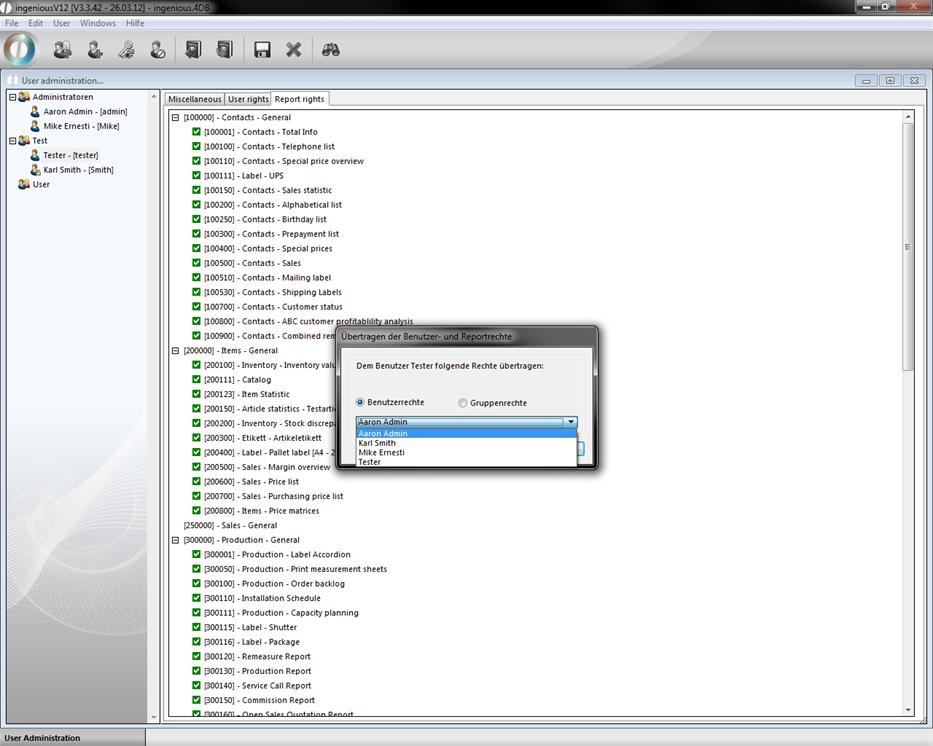
Also you can transfer rights of a group to a single person. To do so choose “group rights” in the window “Transfer user- and report rights”.
You can reset user and group rights with a click on the icon ![]() . As a result the rights of the group the user belongs to are transferred to him.
. As a result the rights of the group the user belongs to are transferred to him.